Showing posts with label sewing. Show all posts

Wednesday, April 11, 2012

Embellished tabs. Finally!


I FINALLY finished the embellished tabs tutorial! Download the tutorial and template PDF!
Monday, October 24, 2011

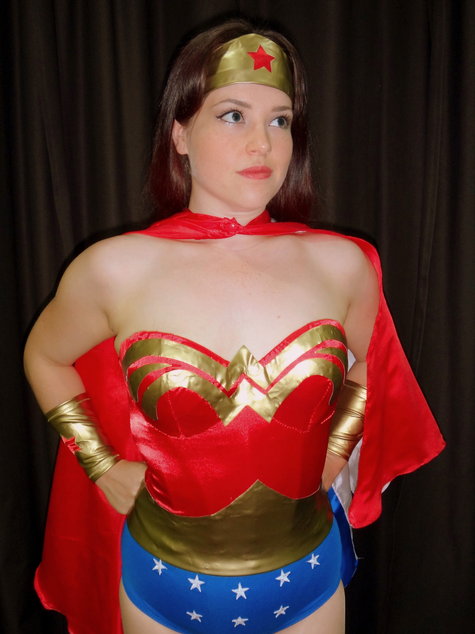
Wonder Woman!


I've entered my Wonder Woman costume in the Bernina Halloween costume contest! To vote for me, and check out more awesome pictures click here. Voting starts 10/25. :)

Friday, July 8, 2011

The Cobblestone Quilted Rug.


What can you make with an old towel and some scraps from your fabric stash? This sweet rug! I sewed this up yesterday  and I LOVE how it turned out! I am working on the pattern, so you can make your own.

ADDED BONUS: You can make this with Jelly Roll Strips!

Sunday, June 12, 2011

Adventures in Draping.


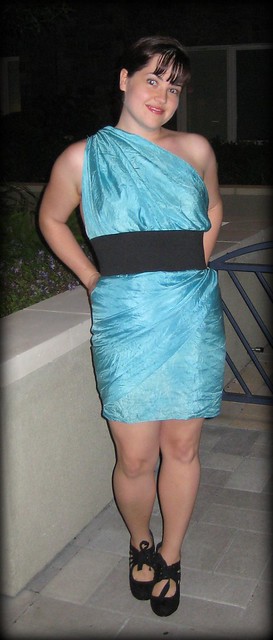
I've done a tutorial on Instructables, for making this Hand-Dyed Draped Silk Dress. Check it out! It is entered in the Burda Fashion Contest, So don't forget to vote after June 13th.

Monday, May 16, 2011

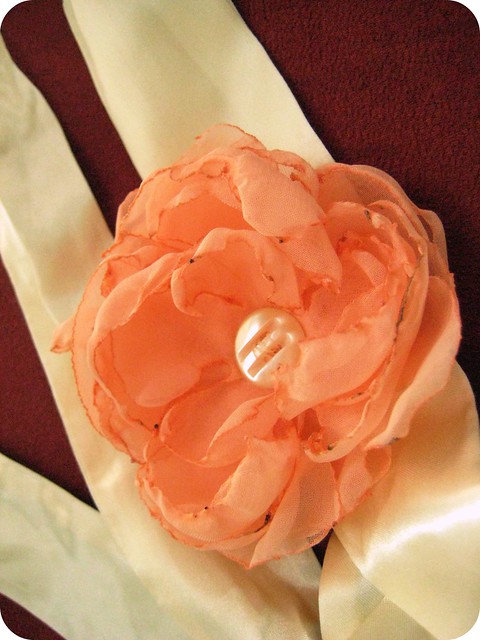
Make Handmade Chiffon Flowers


For the full article and slideshow instructions, click here.

Thursday, April 28, 2011

Lazy and Non-artistic People, Rejoyce!

My semi-award winning play mat has been released as a PDF sewing pattern. It now includes all the templates needed to make your own! Check it out here.

Saturday, March 26, 2011

My Entry for the Instructables Quilting Contest!


For a full tutorial, check out the Instructable.
Don't forget to vote for me after April 10th!

Tuesday, May 11, 2010

Make better Fitted Diapers with your NykiBaby One Size Diaper Pattern!

Here are a few little goodies to help you make better fitted diapers with my pattern:
*Single row of snaps. Fewer snaps to set is a good thing!


*My pattern directs you to not trim off any fabric in the leg elastic areas. I've started trimming of 1/2", just like I do through the rest of the diaper. I am liking this way better.


* New contour templates. These fit the diaper so much better. You can trim off up to 1/4" on these when you serge, if you like. I just barely skim them.

Tuesday, May 4, 2010

Performance Fleece You Won't Find at Old Navy.....

Old Navy might make a mean fleece vest, but they've never done THIS! To all the Kiki Pad fans out there, this is for you...

How to Make Fleece Kiki Pads

Click the picture for a larger image.

Monday, April 5, 2010

Fat (Quarter) Skirts.


If you're like me, you ate WAY too much Easter candy. (I found Cadbury Cream Eggs that we forgot to give to the kids...OMG!) Time to make some Fat (Quarter) Skirts! 

Elastic waist? CHECK! Unlimited ass expansion room? CHECK! This skirt is about knee length on me (I'm SUPER short, barely 5'. In case you don't know me in RL...lol) and fits about a size 6 (Pre-Easter) to about a size 10 (Post Easter). Just gather the elastic tighter if you ate like a rabbit, or looser if you went savage on a case of Peeps. 

Click the image above for a larger picture.

Thursday, April 1, 2010

Lovely!

One of my testers made this lovely bag from my new pattern. She did such an awesome job! I am waiting on photo permissions from some of the other mamas, so I can show off their gorgeous bags too.

Tuesday, March 30, 2010

Go Mama!

It's done!! My new pattern is done! It's available in my Hyena Cart Shop, and my Etsy Shop. You know you want to sew one up! 

Monday, March 22, 2010

Super Exciting Stuff!


My fourth pattern is finished! The "Go Mama!" diaper bag pattern went out to testers today. Hopefully, if they don't discover some huge, glaring mistake; the pattern will come out in the next couple of weeks. This is my first pattern that's more about design and not just function, so I am nervously awaiting feedback. I can't wait to post pictures of the testers!

Hmmm...Now that this pattern is done...What should I do next?

Saturday, January 16, 2010

Meet Big n' Fluffy


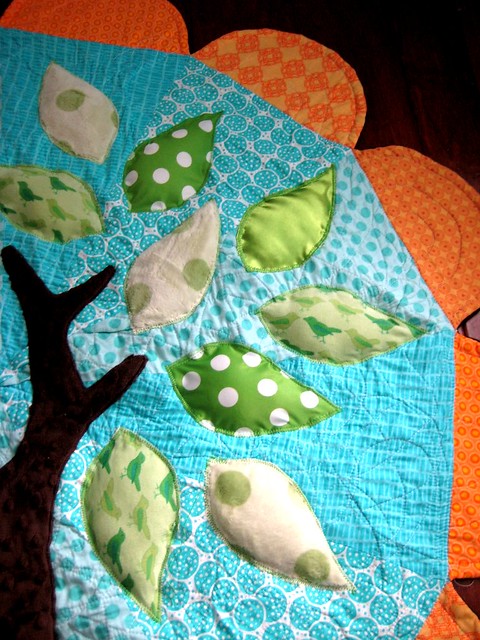
I was digging around in the boys' closet yesterday, and I found an extra big, extra fluffy pillow. Big and fluffy is a good thing for pillows. It's not a good thing when it's taking up tons of space in an already packed closet! Big n' Fluffy has been in hiding because it had no cover. I figured I could clear out a little bit of fabric and closet space by making a pillow cover and putting that mass of squishy, feathery goodness onto my couch. This is what I did:

Disclaimer: The tree with scrappy leaves design is not mine. I've seen it somewhere before, but I cant find it at the moment. 


I cut out the leaf and trunk shapes from various fabrics in my stash. (The trunk used to be part of my viking Halloween costume!) I then used a washable kid's glue stick to stick everything in place.


I used some micro fleece as a backing, then stitched around each piece about 1/8" from the edge. I threw it in the washer and dryer to fray the edges. I finished off the cover by using two overlapping pieces of the main fabric to make a quick sham back


Here's Big n' Fluffy chillaxin' with his new buddies.


Friday, January 1, 2010

Make Your Diapers Even Cuter!

Here's an easy way to add cute prints to your diapers without causing wicking or spending $13+ a yard for print PUL. The best part is you can use ANY fabric! Cotton, poly, woven, knit, minky.... Since the fabric doesn't touch the inside of the diaper, even absorbant fabrics like cotton wont cause wicking. Also, since this technique uses a small amount of fabric, cut in a simple rectangle, you won't waste any of your expensive, cute fabrics.

Materials:

Your trusty NykiBaby One Size Diaper Pattern
1- cut of PUL from said pattern
1- cut of inner fabric from said pattern (suedecloth, microfleece, whatever floats your boat.) + your pocket facing
1- 5 3/4" by 19 1/2" piece of decorative outer fabric. This will be the strip down the middle of the diaper.
Snaps and Elastic as called for in the pattern.

Directions:

You will apply your decorative strip BEFORE marking the snap placements for your diaper.

Turn all 4 edges of your decorative fabric under by 1/4" and press if the fabric allows.

*If you are using a fabric that cant be pressed or wont stay turned under, you can use a washable glue stick to stick those stubborn edges in place. Don't worry, the glue will wash out and no one will know your secret.

Center your decorative fabric on your PUL diaper cut, 1/2" from the front and back of the diaper. You don't want your decorative fabric to get caught in the seam allowances. This could cause wicking. You can use pins at the front and back ends, to keep the fabric in place, but not through the middle. You don't want to poke too many holes in your PUL. Your best bet is to use your handy-dandy washable glue stick to stick the fabric in place.

Now that your fabric is in place, stitch it down close to the edge, using a medium-long straight stitch.

Proceed with your diaper as usual.

There have been a few reports of leaking along the seam where the decorative fabric is attached. To prevent leaks, make sure you use 100% poly thread, and the finest needle that will work for the fabric. Setting your stitch to a longer length may help as well. If you still have leaks, try using a little seam sealer (like for tents) on the inside, along the seams.

Monday, October 26, 2009

Snappy Travel Tissue Pouch Tutorial.

IMG_4902
Today I made some cute little travel tissue pouches. They keep your travel size tissue packs from getting completely destroyed in the bottom of your bag. They were so super quick and easy, I thought I'd do a little tutorial for you.
IMG_4882
Start with 6 1/4" by 7" pieces of your outer and lining fabrics.
IMG_4884
Place the fabric right sides together. Using a 1/4" seam, stitch along the two shorter ends.
IMG_4886
Flip right side out. Top stitch along the two seams. Add snaps in the center, close to the edge. One snap should be facing up, the other down.
IMG_4892
Snap the pouch inside out. Sew a 1/2" seam along each side, or serge, cutting off about 1/4".
IMG_4896
Turn right side out, and place a travel pack of tissues inside. Done!

Friday, October 9, 2009

Fluff-o-Rama!


8 PUL Pocket, and 6 knit, fitted diapers for your viewing pleasure. These dipes will be coming with me to the holiday fair being put on by my moms group. What doesn't sell there will be listed in my Etsy or Hyena Cart Shops.

Saturday, September 12, 2009

Ardenwood Ren Faire

Hubby doesn't do ren fairs, so I went with my brother and sister, and enjoyed a toddler free couple of hours.

Pros:

*I was charged the "teen" entrance fee. The guy didn't even bother to ask my age. I will be 27 next month.

*The jousting was awesome.

*The mango lemonade was good.

*We didn't get lost driving there, or lose the car in the parking lot.

*The crazy dragon costume guy.

Cons:

*No shade= Wicked sunburn.

*Not enough vendors/ shows/ activities.

*Too many people in regular clothes. Seriously, why go if you are not going to dress up?

*Weak belly dancing.

*REALLY disorganized layout.


Crazy Dragon Guy

Thursday, August 27, 2009

The Ultimate Upcycled Renaissance Costume


My costume is finally done!! Every single bit of fabric on this thing either used to be something else, or was a scrap from another project.

Dress: Hideous sofa slipcover from Goodwill
Sleeves: Leftover from sewing a corset
Chemise: Playpen cover
Partlet and hair covering: Old sheer curtains
Velvet ribbon at waist: Drawstring from old yoga pants

The only part of the dress that is new are the buttons. So I paid $15 for the whole thing.

For the geeks out there, this is a 1490's Florentine merchant class costume.

Monday, August 10, 2009

Un-Fancy Cloth Napkins

IMG_4555


I am really making an effort to used fewer paper napkins and paper towels in my house. I hate spending money on things that will end up in the trash. I could be saving that money for an embroidery machine! (or just blowing it on fabric.) Anything is better than just throwing it in the trash!

The main consumers of paper towels around here are messy little faces. So, I came up with these fun and kid friendly cloth napkins. They are made from cotton quilting fabric and simply serged around the edges. Obviously, you could press and hem them, they would actually look nicer. But, I don't have that kind of time (or motivation). They are 8 1/2" square. Just the right size for little hands. And, since they don't take much fabric, they are a great stash buster.